Key Takeaways
-
Traditional Roblox asset creation forces you to juggle tools like Roblox Studio and Blender, which breaks your creative flow and often stops you before you finish your first model.
-
Many AI generators output messy topology that blows past Roblox’s 10,000–20,000 triangle limit, so you end up stuck in hours of retopology and cleanup.
-
A browser-based platform with real-time retopology, LOD controls, and direct FBX/glTF export removes tool switching and helps you create game-ready assets in 15 minutes to 1 hour.
-
Core workflow steps include generating models from text or images, dialing in polycount, rigging and animating characters, playtesting with friends, and importing into Roblox Studio without extra cleanup.
-
Nilo’s browser workflow stands out because it handles the technical work for you so you can focus on ideas and gameplay.
What Makes a Roblox Asset Actually Game-Ready
You create successful Roblox assets by matching creative ideas with the right technical structure. Game-ready 3D models need clean topology, reasonable polygon counts, and correct export formatting. Roblox represents imported custom 3D meshes as MeshPart objects, and these MeshParts must follow specific rules for performance and compatibility.
These requirements explain why traditional workflows feel so heavy. You start with basic parts in Roblox Studio, then jump into Blender for custom modeling, UV unwrapping, retopology, and export settings. Every time you switch tools, your momentum drops and a new layer of technical setup appears.
Why Most Beginners Quit Before Finishing Their First Asset
Tool fragmentation, not lack of ideas, blocks most aspiring builders like you. Traditional 3D asset pipelines often take 20–40 hours per character for modeling, UV unwrapping, texturing, and rigging. When you are still learning each tool, that timeline stretches even longer.
Most aspiring builders hit three connected roadblocks, all caused by that fragmented toolchain.
Retopology Hell: Many AI generators create models with messy topology that needs manual cleanup in Blender. You spend more time fixing geometry than actually creating, which sets up the next problem.
Polycount Anxiety: After cleanup, you still face Roblox’s strict performance limits. You might not know how to lower polycount without wrecking the look of your model, and the tools rarely guide you. Even if you push through that, one more barrier waits.
Export Confusion: Moving models from Blender into Roblox Studio means dealing with file formats, naming rules, and import settings that often break or behave unpredictably.
Skip retopology hell, polycount anxiety, and export confusion by trying an AI-native workflow that keeps everything in one place.
Roblox Polycount and Performance Rules Explained Simply
That polycount pressure you feel has a clear reason. Roblox caps meshes at roughly 10,000–20,000 triangles so games run smoothly on phones, tablets, and lower-end devices. High-detail sculpts from Blender or generic AI tools often exceed these limits by ten times or more.
Level of Detail (LOD) systems help by reducing polygon counts as objects move away from the camera. Distant objects use fewer triangles, while close objects keep more detail. Retopology rebuilds a high-poly sculpt into a clean, low-poly mesh that works in real-time game engines, but manual retopology usually demands advanced Blender skills.
You get the smoothest experience when your models start with clean topology and Roblox-friendly polycounts instead of messy AI output that needs hours of repair.
The Fastest Path to Your First Asset in 7 Steps
Step 1: Open a browser tab and start a new world
Open your browser and launch the creation platform. You land in a 3D environment with simple building tools, and you do not install anything. This setup usually takes under a minute and works on most devices.
Step 2: Generate your first model from text, sketch, or image
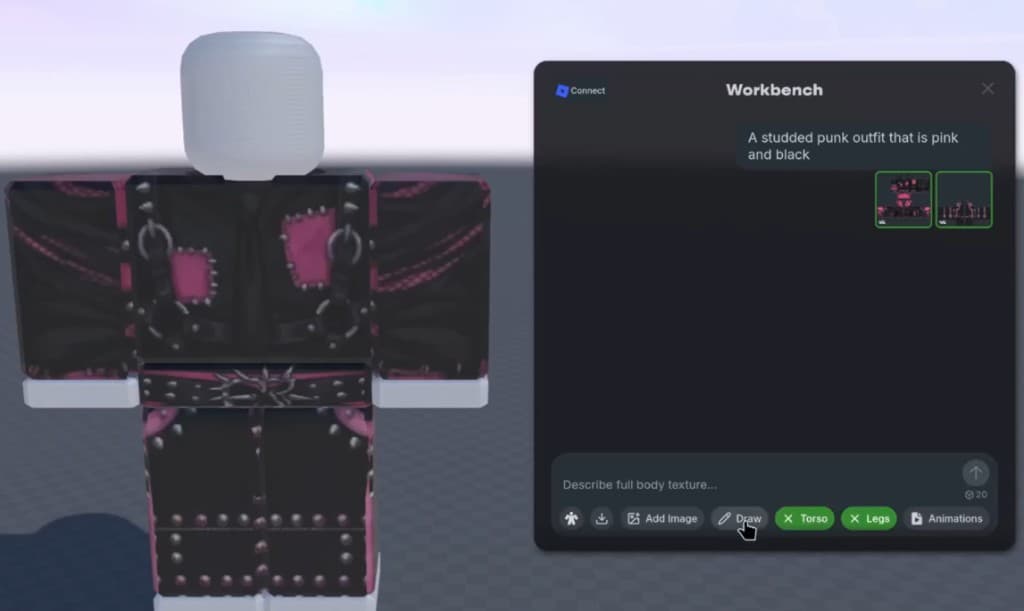
Describe what you want, upload a reference image, or sketch directly in the interface. You can create 3D characters, weapons, and detailed props in seconds by prompting or drawing. The AI returns several options in about 1–2 minutes so you can pick your favorite.

Step 3: Use real-time retopology and level-of-detail controls
Move the LOD slider to bring polygon counts into Roblox-safe ranges. The platform cleans up topology and adjusts polycount so your models work in Roblox Studio without extra steps. One builder from Nilo’s February 2026 survey said, “I do not have to spend hours on 3D modeling the simplest things, now I can use Nilo and do it in 15 seconds.”
Step 4: Rig and animate with one click
Apply character rigs instantly, instead of spending days setting bones and weights in pro tools. Then type what you want your character to do, such as “run forward and jump,” and generate animations that play right away.

Step 5: Preview and playtest with friends using a link
Share your world URL so friends can join, build, and play with you in real time. Watch how your assets behave in a live 3D space before you commit to export.
Step 6: Export as FBX or glTF
Download Roblox-ready files with a single click. The export includes clear naming, optimized geometry, and the data Roblox Studio expects. Another builder from Nilo’s February 2026 survey said, “I like how it feels like a good game engine rather than a vibe coding tool, with easy building and a good focus on being able to export and import content.”
Step 7: Import directly into Roblox Studio
Open Roblox Studio, use Asset Manager to import your FBX file, then drop the model into your experience. The asset appears ready to use, without extra optimization or emergency fixes.
Quick Reference Checklist
Use this checklist when you want a fast reminder of the full flow you just learned.
-
✓ Open browser creation platform
-
✓ Generate model from text, sketch, or image
-
✓ Apply LOD optimization
-
✓ Add rigging and animation
-
✓ Playtest with friends
-
✓ Export as FBX or glTF
-
✓ Import to Roblox Studio
Common First Mistakes and Simple Fixes
Skipping LOD optimization: You might feel tempted to export as soon as the model appears. Always adjust the level-of-detail slider first so your asset stays within Roblox limits.
Ignoring scale: Even with good polycount, AI-generated models often come in at the wrong size for Roblox characters. Preview your assets in the 3D scene, compare them to a character, and tweak scale before you lock things in.
Forgetting animation testing: A rigged character can look perfect while standing still but break as soon as it moves. Play every animation in the preview environment and watch from different angles.
Overcomplicating first projects: You build confidence faster when you start small. Focus on simple props like swords, hats, or crates before you jump into full characters or huge environments.
Can You Make Your Own Roblox Assets?
You can absolutely create your own Roblox assets with modern AI-native workflows. Roblox expects you to use third-party modeling tools such as Blender or Maya for custom meshes, but AI-first platforms let you skip most of that complexity. You describe, sketch, or upload a reference, then generate, refine, and export assets that feel professional without deep 3D training.
What Is the Easiest Way to Create Models for Roblox?
The easiest path keeps everything in one browser-based workflow that combines AI generation with real-time optimization. Traditional methods ask you to learn Blender, master UV mapping, and manage polygon counts by hand, which can take months. Modern platforms let you say what you want, handle retopology and LOD in the background, and then export straight to Roblox Studio with the right settings.
Comparing Three Common Paths to the Nilo Workflow
The table below shows how different creation methods stack up on time, cleanup work, and Roblox compatibility. Traditional tools usually trade your time for quality, while generic AI tools trade quality for speed. The Nilo-style workflow aims to give you both speed and Roblox-ready results.
|
Method |
Time Investment |
Cleanup Required |
Roblox Compatibility |
|---|---|---|---|
|
Roblox Studio Parts |
30 minutes – 2 hours |
None |
Perfect (limited shapes) |
|
Blender Modeling |
5-20 hours |
Manual retopology, UV unwrapping |
Requires optimization |
|
Generic AI Generators |
2-5 hours |
Extensive mesh cleanup |
Usually exceeds polycount limits |
|
Nilo Workflow |
15 minutes – 1 hour |
None |
Automatic optimization |
See this 15-minute style workflow in action by trying an AI-native browser tool and creating your first asset today.

Next Steps After Your First Asset
After you create and export your first Roblox asset, build a repeatable routine. Keep making simple props and accessories until the full flow feels natural, then move into rigged characters and larger scenes.
Connect with creator communities where you can share work, get feedback, and learn from other aspiring builders or already builders like you. Community developers earned $1.5 billion on Roblox in 2025, which shows how far consistent practice and sharing can take you.
Try different generation inputs on the same idea. A text prompt, a quick sketch, and a photo reference each push the AI in slightly different directions. As you compare results, you learn how to steer the tool and keep more creative control.
Focus on fast iteration instead of perfect models. When you can create, test, and tweak assets quickly, you learn what actually works inside real Roblox experiences and improve with every session.
Start creating your first game-ready asset tonight by using an AI-native browser platform like Nilo. The platform handles the technical details and keeps you in creative flow, which gives you the best chance to grow as a Roblox creator.
Frequently Asked Questions
Do I Need Any 3D Modeling Experience to Create Roblox Assets?
You do not need prior 3D modeling experience when you use AI-powered creation tools. You can generate strong-looking assets from text, sketches, or reference images while the platform manages topology, UV mapping, and polygon counts. Basic ideas like scale, proportions, and in-game behavior still help, and you pick them up naturally as you build and test.
How Do I Make Sure My Assets Meet Roblox’s Performance Requirements?
Roblox keeps meshes around the 10,000–20,000 triangle range so games run well on many devices. Modern creation platforms give you an LOD slider that adjusts polycount in real time. Use that slider until the model looks good and stays light, then preview it in 3D before export. A solid platform also takes care of file formats, naming, and mesh cleanup so you do not have to script your own fixes.
What Is the Difference Between Creating Assets and Creating Full Games?
Asset creation focuses on single 3D pieces such as characters, weapons, props, or environment chunks that you can reuse across projects. Full game creation adds scripting, gameplay systems, level design, UI, and publishing. Many tools shine at asset generation but need extra software for full games. Starting with assets lets you grow a library and build skills before you tackle complete experiences.
Can I Sell the Assets I Create on the Roblox Marketplace?
You can sell the assets you create through Roblox’s UGC marketplace or use them inside your own experiences. With the creator economy offering paths from single-asset sales to full game monetization, you give yourself better chances when you focus on original, high-quality assets that follow Roblox’s content rules and technical specs.
How Long Does It Usually Take to Create a Complete Asset?
With modern AI-powered workflows, you can create a Roblox-ready asset in about 15 minutes to 1 hour, depending on complexity. That window includes generation, cleanup, rigging for characters, and export. Traditional pipelines in Blender or similar tools often take 5–20 hours for the same kind of asset, plus extra time just to learn the software. AI-native platforms stand out because they protect your creative momentum so you spend your time designing instead of wrestling with menus.